How to Run a Co-Design Session With Non-Designers Co-Design

Most designers approach co-design sessions with non-designers completely wrong. They walk in with polished prototypes, clear next steps, and a facilitator guide that looks more like a script than a genuine invitation to collaborate. Then they wonder why participants sit passively, offer one-word answers, or seem genuinely uninvested in the outcome. The problem isn’t the participants—it’s the designer’s inability to surrender control.
I’ve run more than sixty co-design sessions over the past eight years, working with everyone from hospital administrators to teenage soccer players, from C-suite executives to factory floor workers. The sessions that produced genuinely transformative ideas share one characteristic: they treated participants as domain experts with irreplaceable knowledge, not as user research subjects to be mined for insights. If you’re still thinking about non-designer participants as people who need design explained to them, stop reading now. This guide assumes you already understand that your users know things you don’t—and that you’re humble enough to learn them.
Here’s what actually works when you’re facilitating design work with people who don’t share your vocabulary, your tools, or your professional background.
What Exactly Is a Co-Design Session?
A co-design session is a structured collaboration where the people who will ultimately use a product or service actively participate in designing it. Unlike traditional user research—where you observe, interview, and test—co-design puts the creative tools directly into participants’ hands. They aren’t just reacting to your ideas. They’re generating their own.
The distinction matters enormously. When someone critiques a prototype you’ve built, you’re getting feedback on a solution. When someone builds something from scratch to solve their own problem, you’re getting insight into how they conceptualize the problem in the first place. That’s a fundamentally different type of knowledge, and it’s the reason co-design has moved from design school buzzword to legitimate methodology at organizations like the NHS, Philips, and IBM.
The term gets thrown around carelessly, so let me narrow the definition for practical purposes. In this guide, I’m talking about facilitated sessions lasting anywhere from ninety minutes to two days, involving anywhere from four to twelve non-designer participants, focused on generating ideas, mapping problems, or prototyping solutions. This isn’t casual feedback collection. It’s structured collaboration with clear outputs.
Why Non-Designers Bring Things You Can’t Manufacture
Here’s where I need to push back against a persistent myth in the design community. Many designers genuinely believe that the special sauce they bring to problem-solving is creativity itself—that non-designers lack the “design thinking” skills to contribute meaningfully. This is not just wrong. It’s arrogant, and it actively undermines your sessions.
Non-designers bring three things you cannot replicate no matter how many design sprints you run:
First, lived experience. A patient who manages a chronic illness daily understands the 2 a.m. frustrations of their condition in ways no amount of user research can capture. A teacher who has managed a classroom for fifteen years knows which administrative workflows actually work and which ones exist only because someone in headquarters decided they should. This experiential knowledge is context-specific and continually updating. You can observe it, but you can’t manufacture it.
Second, constraint knowledge. Designers often generate elegant solutions that fall apart in implementation because they don’t understand the real-world constraints participants face daily. A facility manager knows which proposed layout changes would violate fire codes. A nurse knows which proposed technology would slow down patient care. These aren’t problems you want to discover during development.
Third, creative distance. Designers suffer from something called “design fixation”—the tendency to generate solutions within the boundaries of what we already know to be possible. Non-designers don’t have this constraint. They’ll suggest solutions that would never occur to you because they’ve never been told those solutions are infeasible. Sometimes their ideas are genuinely impossible. More often than you’d expect, their impossible ideas become possible when you understand the underlying need they were trying to address.
The key is understanding that you’re not bringing design skills to non-designers. You’re bringing facilitation skills that help non-designers express knowledge you don’t possess. The moment you reframe your role from “teacher” to “translator,” everything else falls into place.
Step 1: Define Goals and Scope Before You Invite Anyone
Every failed co-design session I’ve witnessed traces back to the same root cause: unclear objectives. The facilitator had a vague sense they wanted “user input,” invited a handful of people, and then figured out what to do with them once everyone was in the room. This is the equivalent of starting a construction project before you have blueprints. It wastes everyone’s time and guarantees a poor outcome.
You need to answer three questions before you send a single invitation:
What decision are you trying to inform? Co-design isn’t a generic “get user input” activity. It needs to serve a specific upcoming decision. Are you trying to decide between two competing concepts? Are you mapping pain points to identify priorities for your next sprint? Are you generating new concept directions for an unsolved problem? The clearer your decision, the more focused your session can be.
What type of output do you need? Different sessions produce different outputs. If you need quick validation on an existing direction, a rapid feedback session works. If you need new concept directions, you need ideation activities. If you need to build organizational buy-in, you might need a session that produces shareable artifacts. Don’t choose activities based on what sounds fun. Choose them based on what output you need.
Who needs to be in the room to produce that output? This is where most designers fail. They invite whoever is available or whoever they think represents “the user.” But the right participants depend entirely on the decision you’re trying to inform. If you’re designing a tool for radiologists, you need radiologists—not their managers, not IT, not patients. The participants should be people who will either use what you’re building or whose buy-in is required for it to succeed.
Write your objectives down. Share them with a stakeholder before you proceed. If you can’t explain in two sentences why this session is worth everyone’s time, you shouldn’t be running it yet.
Step 2: Recruit Participants Who Will Actually Contribute
Recruitment is where most co-design sessions die. Not in the session itself—you can often recover from a poorly facilitated session. But you cannot recover from having the wrong people in the room.
The most common recruitment mistakes are predictable. Designers invite colleagues they know because it’s easy. They invite the most articulate users they’ve ever interviewed, mistaking verbal fluency for valuable perspective. They invite people who are available rather than people who are relevant. And they forget that co-design requires a significant time investment from participants, which means you need to make the case for why someone should give you that time.
Recruit for diversity of perspective, not diversity of demographics. The goal isn’t to check boxes. It’s to ensure you’re capturing a range of needs, constraints, and mental models. If you’re designing for small business owners, you need owners at different company sizes, in different industries, with different levels of technical comfort—not just a representative from each demographic category.
Consider offering compensation. If you’re asking people to take half a day away from their work, you need to acknowledge that you’re asking something valuable. A gift card, a donation to a charity of their choice, or a tangible product from your company all signal that you respect their contribution. Some organizations successfully use “pay it forward” models where participants contribute their time with the expectation that others will do the same—but only if you’re building a community of engaged users. For one-off sessions, compensation matters.
Screen participants before confirming. A short phone call or questionnaire helps you understand whether someone will be a productive participant. You’re looking for people who have thoughts about the problem space, who are comfortable expressing those thoughts in a group setting, and who aren’t going to dominate the conversation or sit silently the entire time. Both extremes are equally problematic.
Aim for six to eight participants. Any fewer and you lose the generative benefits of group dynamics. Any more and you can’t give everyone meaningful airtime in a single session. If your project requires more voices, run multiple sessions rather than packing more people into one room.
Step 3: Choose Activities That Match Your Objectives
Here’s where the designer’s toolbox becomes both an asset and a danger. There are hundreds of co-design activities out there—journey mapping, affinity diagramming, bodystorming, paper prototyping, card sorting, “how might we” generation, and on and on. Each activity has a specific purpose. Using the wrong activity for your objective is like using a hammer when you need a screwdriver.
Let me cut through the noise with three categories that cover most co-design scenarios:
If you need to understand the problem space, use mapping activities. Customer journey mapping, empathy mapping, and service blueprinting help participants externalize their experiences in ways you can analyze. These activities work well early in a project when you’re trying to build shared understanding rather than generate solutions. A logistics company I worked with used a physical journey map with their warehouse workers and discovered that the most frustrating pain points weren’t where leadership assumed they were—which completely reframed their development priorities.
If you need to generate ideas, use constrained ideation. Don’t just ask people to “come up with solutions.” Give them specific constraints, prompts, or materials. The “six thinking hats” framework, “crazy 8s” sketching, or “yes and” ideation all impose creative constraints that actually improve rather than limit output. One of the most successful sessions I facilitated used a constraint that sounds counterintuitive: I asked participants to design a solution that would require zero technology. This forced everyone past the “build an app” default and surfaced needs that technology was actually obscuring.
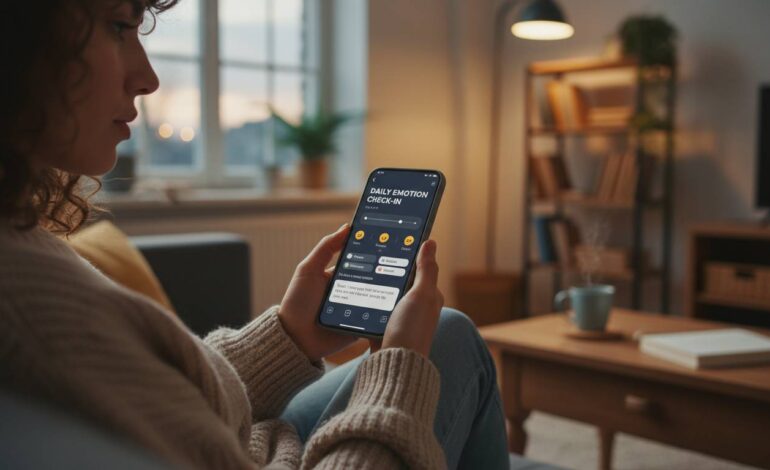
If you need to evaluate or refine ideas, use prototyping and testing. Paper prototyping, role-playing, and “Wizard of Oz” testing let participants interact with concepts before you’ve invested in development. A healthcare startup I consulted for had a breakthrough when they asked patients to prototype their ideal check-in experience using only paper and markers. The physical act of building something—anything—revealed assumptions that verbal discussion had never surfaced.
Whatever activity you choose, make sure you can explain in thirty seconds why that activity will produce the output you need. If you can’t, pick a different activity.
Step 4: Facilitate, Don’t Lecture
This is the shift that separates good co-design sessions from great ones. You’re not there to present. You’re not there to explain design thinking. You’re not there to steer participants toward solutions you’ve already decided are right. You’re there to facilitate a conversation that produces insights you don’t currently have.
Your job has four components:
Set the stage in the first five minutes. Explain what you’ll be doing together, how long it will take, and what will happen with the outputs. Then—and this is crucial—explain what you’re asking of them. “I’m not the expert in this room. You are. My job is to help you capture your expertise, not to teach you design.” Say this explicitly. It changes the dynamic immediately.
Use warm-ups deliberately. Even for experienced facilitators, this step gets skipped in the name of efficiency. Don’t. A five-minute warm-up activity—simple drawing exercises, pair introductions, or “two truths and a lie” related to the problem space—activates participation and builds group trust. The investment pays dividends throughout the session. I’ve seen sessions transform after a warm-up that helped participants realize others shared their frustrations.
Stay neutral on content. This is harder than it sounds. When someone proposes an idea that won’t work, your instinct is to explain why. Resist. Ask clarifying questions instead: “Help me understand how that would work in your daily workflow.” Let the group evaluate ideas rather than having you adjudicate them. Your neutrality signals that all contributions are welcome, which is the only way you’ll get the contributions that actually matter—the weird, uncomfortable ones that participants would hesitate to share if they thought you’d judge them.
Watch the energy. Group dynamics are fragile. If two participants are dominating, explicitly invite others: “I’d love to hear from someone who hasn’t spoken yet.” If energy is flagging, take a break or switch to a different activity type. If someone is checking out entirely, check in with them directly during a break. You’re responsible for the quality of everyone’s experience, not just the quality of the outputs.
Step 5: Capture and Implement What You Learn
A co-design session that produces great insights but never influences product decisions is just entertainment. The session ends when the session ends—but your work continues.
Capture outputs in real-time. Assign someone to document everything—literally everything—during the session. Photos of artifacts, recordings of discussions (with permission), sticky notes, sketches. You’ll need this documentation when you’re synthesizing insights later. I’ve seen teams try to reconstruct sessions from memory, and they always miss something important.
Synthesize within forty-eight hours. Memory decays fast. Set aside time the day after your session to review everything you captured and identify themes. Don’t try to do this alone. Bring in someone who attended the session to help you interpret what you observed. Look for patterns that appeared across multiple participants. Look for surprises—ideas that came from left field that you don’t have an easy explanation for. The surprises are often the most valuable outputs.
Share back with participants. This step is optional but I consider it essential. Send participants a summary of what you heard, what you’re planning to do with it, and when they can expect to see the results. This closes the loop respectfully and builds trust for future engagement. People who feel heard become advocates for your process. People who feel used become detractors.
Create a clear action plan. For each insight generated, specify: What are we going to do with this? Who owns next steps? When will we revisit this decision? Without this specificity, insights become artifacts that sit in a folder and gather dust.
Activities That Actually Work With Non-Designers
Rather than giving you an exhaustive list, here are four activities I’ve tested extensively with non-designer participants and can recommend without hesitation:
The “Bad Idea” Exercise: Ask participants to generate the worst possible solution to the problem you’re solving. This sounds silly, but it’s remarkably effective at surfacing unspoken assumptions. Once you’ve generated intentionally bad ideas, reversing them often produces genuinely good ones. Participants also feel liberated when they realize nothing they suggest will be judged.
Constraint-Based Sketching: Give participants fifteen minutes to sketch three solutions using only three materials—paper, marker, and tape, for example. Limiting materials limits the complexity of what they can produce, which paradoxically makes it easier to start. The constraint also prevents the perfectionism that freezes people who think they “can’t draw.”
Role Rotation: During an activity where participants are testing or evaluating concepts, have them physically switch roles halfway through. The person who was explaining their idea becomes the person asking questions. This builds empathy and surfaces inconsistencies in how solutions are presented.
Silent Sorting: When you need to prioritize pain points or features, give everyone a stack of cards and ask them to arrange them in order of importance—without discussion. Then compare arrangements. Disagreements about prioritization are gold. They tell you what needs further investigation.
Mistakes That Will Derail Your Session
I’ve made every mistake in this section at least once. Learn from my pain:
Over-preparing content. If you arrive with a slide deck, you’ve already failed. You’re there to learn from participants, not to present to them. The only exception is if you’re showing them work product that was created in a previous session.
Using design jargon. Don’t say “ideation” when you mean “coming up with ideas.” Don’t say “pain points” unless you’ve defined what that means. Don’t assume anyone knows what a prototype is. Use plain language. Always.
Letting stakeholders observe without guidelines. If a product manager or executive wants to watch the session, prepare them first. Give them a role—perhaps they take notes. Brief them that they cannot interject, judge, or correct participants. One unwatched stakeholder who sighs audibly at an idea can shut down an entire group’s creativity.
Running too long. Non-designer participants aren’t trained to maintain creative energy in workshop settings. Ninety-minute sessions are the maximum for most groups. If you need more time, build in explicit breaks or run multiple sessions.
Ignoring the output. I mentioned this earlier but it bears repeating: the session is worthless if nothing changes because of it. If you’ve called a co-design session and then ignored the results, you’ve damaged your ability to run one in the future. Word travels.
Frequently Asked Questions
How many participants should a co-design session have?
Six to eight participants represents the sweet spot for most sessions. Fewer than six limits the diversity of perspective and makes it harder to generate ideas through group dynamics. More than eight makes it difficult to give everyone meaningful time to contribute, especially in activities that require everyone to share simultaneously.
What if participants have no design background?
That’s the entire point. Participants who have no design background bring perspectives that designers cannot replicate. Your job is to facilitate their contributions, not to teach them design. Use activities that don’t require any design knowledge—mapping, sorting, speaking, sketching simple shapes. The quality of ideas doesn’t depend on design skill.
How do I handle a participant who dominates the conversation?
Intervene directly but gracefully. You can say, “Let’s hear from someone else” or assign a specific question to a quieter participant: “What do you think about what was just suggested?” If the dominance continues, have a private conversation during a break. It’s better to address the dynamic directly than to let it undermine the session.
Should I compensate participants for their time?
Yes, in most cases. You’re asking people to give up half a day or more to contribute to your project. Compensation acknowledges that their time has value. Options include gift cards, product gifts, charitable donations in their name, or stipends for longer sessions.
The Honest Truth About Co-Design
Co-design isn’t a magic methodology that produces better solutions by virtue of inclusion. It produces better solutions when the people running the session genuinely believe that non-designers have knowledge worth capturing—and when they’re willing to be surprised, challenged, and sometimes proven wrong by participants.
I’ve been doing this for eight years, and I still find it uncomfortable. Surrendering creative control is hard. Watching someone struggle to articulate an idea you could articulate more clearly is tempting to jump in. Sitting in silence while a group works through a problem you’ve already “solved” in your head requires genuine patience.
But the moments when a participant says something I’ve never considered, when they connect two ideas I would never have connected, when they reveal that the problem I thought I was solving isn’t actually the problem—those moments remind me why I started designing in the first place. I’m not the smartest person in any room I enter. Co-design is the methodology that forces me to admit that.
If you’re running these sessions to check an inclusion box or to validate ideas you’ve already decided on, save yourself the time. The participants will know. And the results will reflect the half-heartedness of your commitment.
But if you’re genuinely curious about problems you’ve only partially understood, if you’re willing to be surprised by people whose lives are different from yours, if you’re ready to let go of the idea that your professional training makes you the expert—then co-design might just change how you design. It certainly changed how I do.