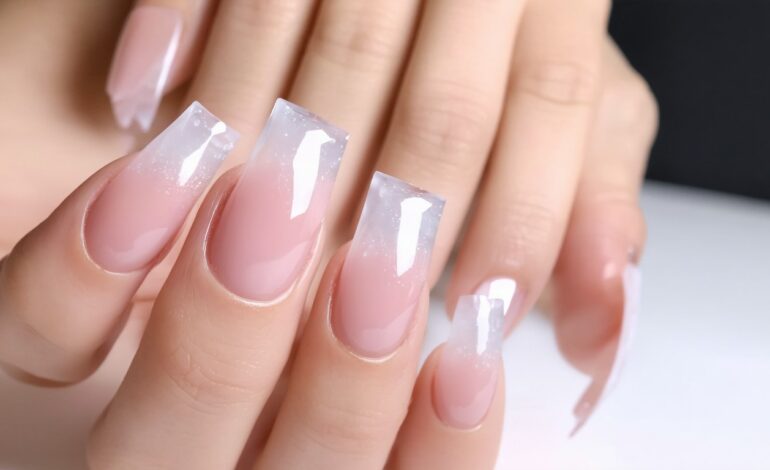
For countless individuals, acrylic nails offer a flawless finish and extra durability that natural nails sometimes lack. However, when it comes time for a change, knowing how to remove acrylic nails safely at home is essential to avoid damaging your natural nails or causing irritation. As home beauty routines have grown in popularity, especially during times when salon visits are less accessible, the demand for safe, effective at-home nail removal methods has surged. Understanding the proper steps and techniques not only preserves nail health but also saves time and money in the long run.
Understanding Acrylic Nails: Why Proper Removal Matters
Acrylic nails, a blend of liquid monomer and powder polymer, are prized for their longevity, strength, and aesthetic versatility. Yet, their removal requires more finesse than just peeling or prying. Improper techniques may lead to thinning, brittleness, or even infections.
According to nail care experts, aggressive removal remains a common cause of lasting nail plate trauma. This highlights the importance of patience and using approved acetone-based methods when considering DIY removal. The danger lies in “popping off” or forcibly tearing away extensions—something dermatologists warn can damage not just the nail, but the delicate skin beneath.
“Attempting to pry off acrylics can result in layers of the natural nail being stripped away, potentially leading to pain and traumatic nail dystrophy,” notes Dr. Dana Stern, a board-certified dermatologist specializing in nail disorders.
A thorough home approach, using materials found in most households or pharmacies, is therefore both safer and more cost-effective than the rushed, risky alternatives.
How to Remove Acrylic Nails Safely at Home: Step-by-Step
Preparation and patience are paramount. With the right supplies and environment, even beginners can prevent damage and discomfort.
Gather Your Materials
Before starting, assemble these essentials:
- Pure acetone (not just basic nail polish remover)
- Nail file and buffer
- Orangewood stick or cuticle pusher
- Small bowl or foil wraps
- Cotton balls or pads
- Petroleum jelly
- A soft towel
Step 1: Trim and File Down the Acrylic
Start by gently clipping your acrylic extensions as short as possible. This reduces the surface area for soaking and makes the entire process faster. Next, use a file to remove the shiny topcoat—this helps the acetone penetrate more efficiently.
Step 2: Protect Skin and Prepare for Soaking
Apply petroleum jelly around your nail beds. This step protects the surrounding skin from the drying effects of acetone, which can otherwise cause irritation or peeling.
Step 3: Acetone Soak or Foil Method
There are two popular methods for dissolving acrylic nails with acetone:
Acetone Soak
- Pour enough pure acetone into a bowl to submerge your fingertips.
- Soak nails for 20–30 minutes, checking periodically.
- The acrylic should become soft and begin to lift.
Foil Wrap
- Saturate cotton pads in acetone.
- Place each pad on your nail and wrap snugly with foil.
- Allow to sit for 20–30 minutes before unwrapping.
Step 4: Gently Remove Softened Acrylic
Using an orangewood stick or cuticle pusher, softly nudge away the softened acrylic. It should lift with little resistance; if it feels hard, re-wrap and soak for a few more minutes.
Step 5: Finish and Restore
Once all acrylic is gone, gently buff the nail surface to remove any residue. Wash hands thoroughly, then apply a generous amount of cuticle oil or moisturizing cream—nail dehydration is common after acetone exposure.
Common Mistakes to Avoid
- Never peel, force, or rip off acrylics.
- Avoid non-acetone removers; they are generally ineffective for acrylic.
- Be patient; rushing can result in lasting damage.
Nail Recovery After Acrylic Removal
Once acrylics are off, natural nails may appear weak or sensitive. The recovery window varies, but a consistent aftercare routine accelerates healing and prevents future breakage:
- Hydrate daily with cuticle oil and rich hand cream.
- Keep nails short while they regain strength.
- Avoid new gel or acrylic enhancements until the nail plate feels healthy.
- Consider a nail hardener if brittleness persists.
Real-world stories from frequent acrylic users show that with attentive care—hydration, protection, and rest—nails can return to full health in a matter of weeks.
When to Seek Professional Help
While at-home removal is feasible for most, there are scenarios where professional intervention is warranted. In the case of persistent pain, visible infection, or stubborn acrylic residue that will not budge, a licensed nail technician or dermatologist should be consulted. Chronic infections or allergic reactions may require medical treatment, highlighting the limitations of DIY strategies.
Conclusion: Gentle Removal Preserves Nail Health
Removing acrylic nails safely at home is a matter of patience, preparation, and following proven steps. Damage can be minimized or avoided entirely by using pure acetone, gentle tools, and protective aftercare. The most important lesson is to resist the temptation of shortcuts—healthy, natural nails are worth the wait.
FAQs
Can I remove acrylic nails without acetone?
While acetone is most effective, some people attempt alternatives like dental floss or non-acetone removers. However, these methods typically do not fully break down acrylic and can increase the risk of nail damage.
How can I reduce irritation during the removal process?
Applying petroleum jelly around cuticles and working in a well-ventilated area can help reduce skin irritation and acetone fumes. Taking breaks if discomfort occurs can also help.
Are there risks to removing acrylic nails at home?
If done improperly, DIY removal may cause thinning, brittleness, or infection. Always follow reputable guidelines and avoid forceful techniques to minimize risk.
How long does it take for nails to recover after removing acrylics?
Nails often take a few weeks to several months to regain normal strength and appearance. Using moisturizing products and avoiding harsh treatments can speed up recovery.
What should I do if my natural nails hurt after removal?
Persistent pain, redness, or swelling may signal injury or infection. Consulting a professional is recommended if symptoms do not improve within a few days.